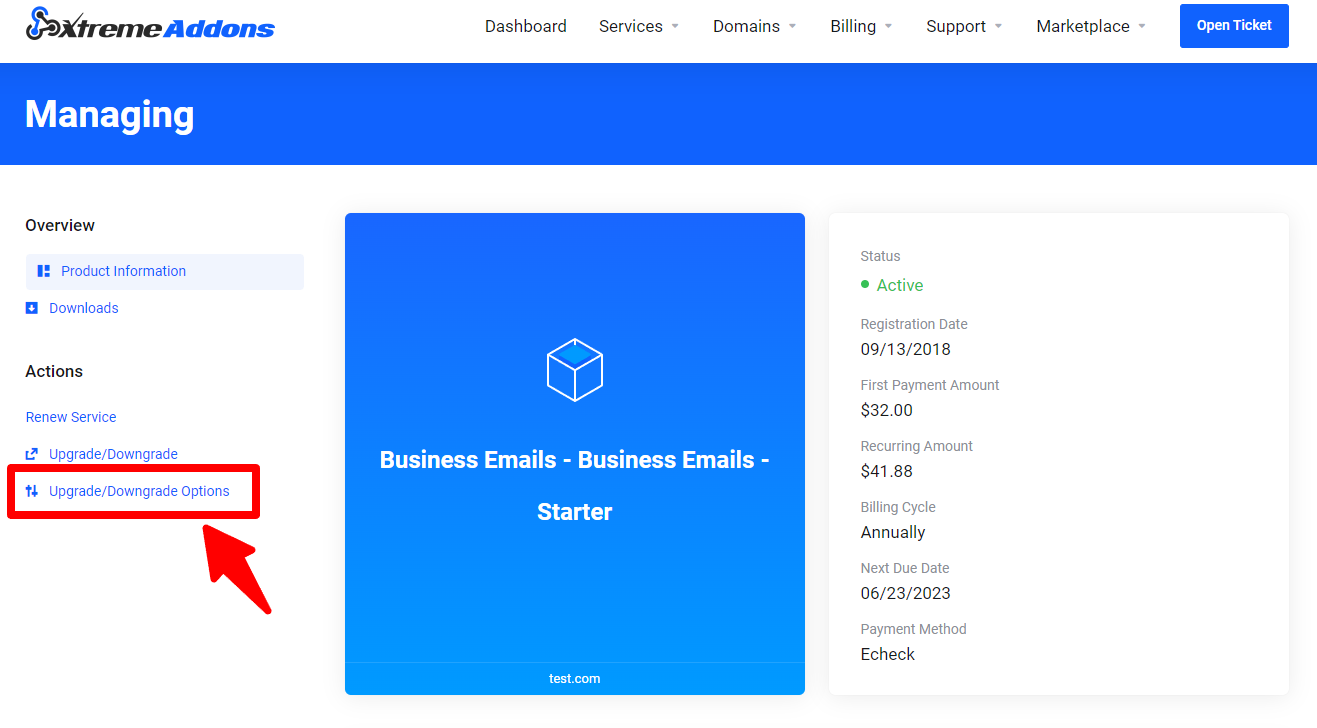
At any point you can add email accounts, follow these simple steps to do it:
1. Log into your client area, and go to > Services > My Services
2. Locate the “Business Email” product and click on “Manage Product”
3. Click on “Upgrade/Downgrade” Options on the right hand side:
4. Type the number of extra emails you would like to add to your account and click “Continue”
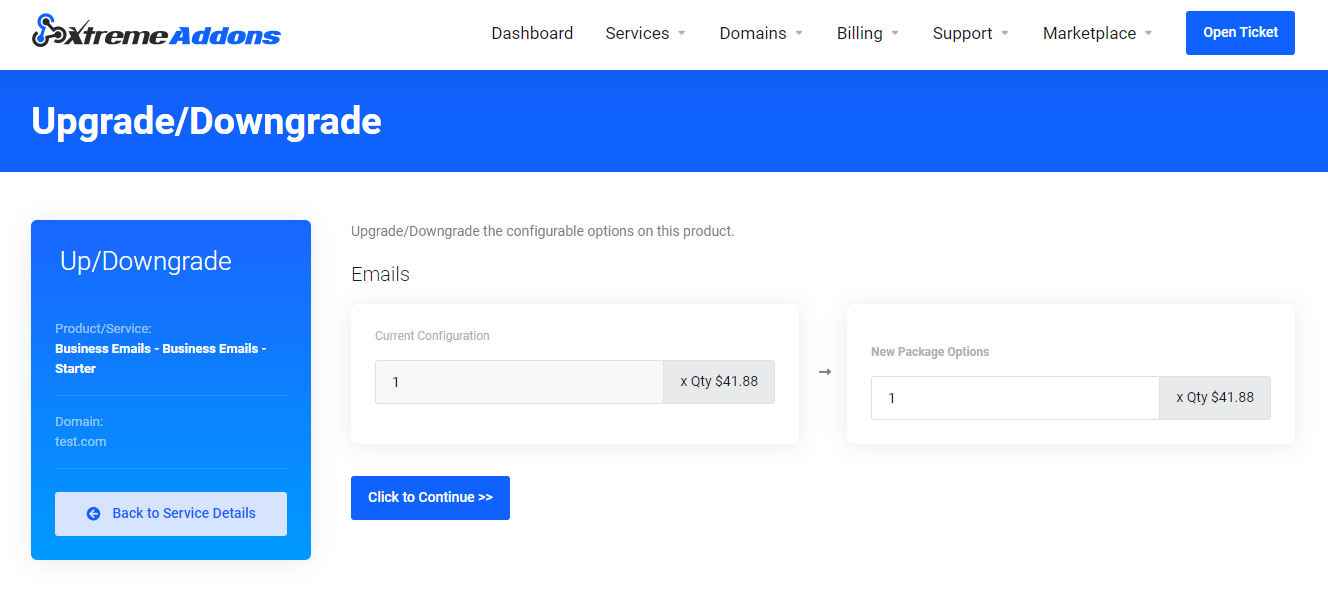
Example: If you see 3, it means that you have a total of 4 emails (1 main email + 3 extras).
So if you need a total of 6 emails, you need to change it it to 5 (1 main email + 5 extras)
5. You will be taken to checkout in order to pay for additional email accounts.
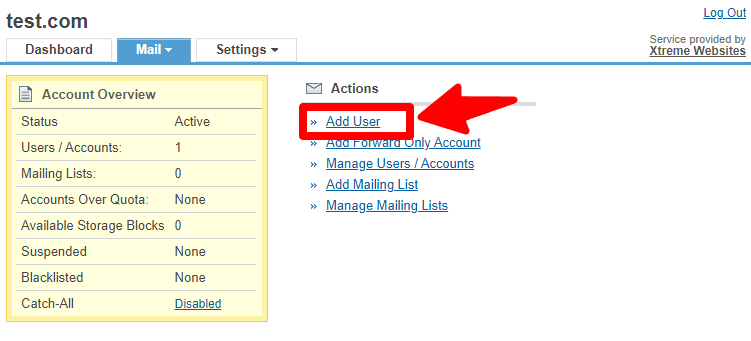
6. Once new email account(s) have been paid, now you can set up the new email users.
Repeat step # 2 but now click on the “MANAGE ACCOUNTS” button, a popup will show up like this:
- Go to Mail >> Add User in your control panel.
- Provide the following information about the user you are adding:
- First and Last name
- The email address you wish to provide this user, e.g. [email protected]
- An alternate email address – all important communication, such as password reminders, related to the account you are creating will be sent to this address.
- Country that the user is based in
- Click on Add User to complete creation of the account.
Once the account is created, a success page will be displayed. This page will provide details of the account that you have added, including a password that is generated for the user and server details for configuring the account in a desktop email client such as Outlook or Thunderbird.
This information will automatically be emailed to the alternate email address you have provided.
What's your Reaction?
You have reacted on"How to add new email accounts"
A few seconds ago


 Subscriptions
 My Orders
 My Wishlist
 Refer & Earn💸
 My Projects
 Conversations
 Website Services
 New Website Request
 Website Addons
 Graphic Design
 Video Production
 Marketing Services
 Get a Marketing Plan
 Local SEO Audit

 Latest Updates
 Consultation Calls
 Tools & Extensions


