Product pages play a pivotal role in converting visitors into customers. Here’s how you can effectively manage them.
Edit Product Page #
- Access Product Page Settings:
- Navigate to Sell Online and select Store Management.
- Choose the product you wish to edit.
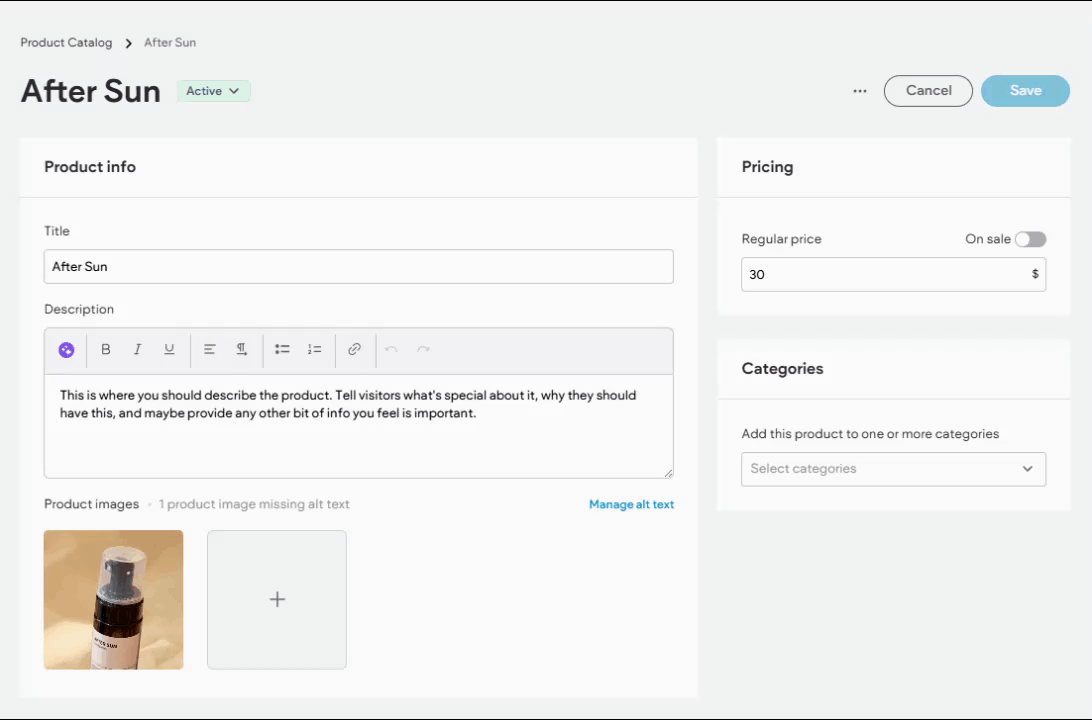
- Modify Product Details:
- Update product descriptions, prices, and images.
- Ensure all information is accurate and appealing.
- Save Changes:
- Click Save to apply your modifications.
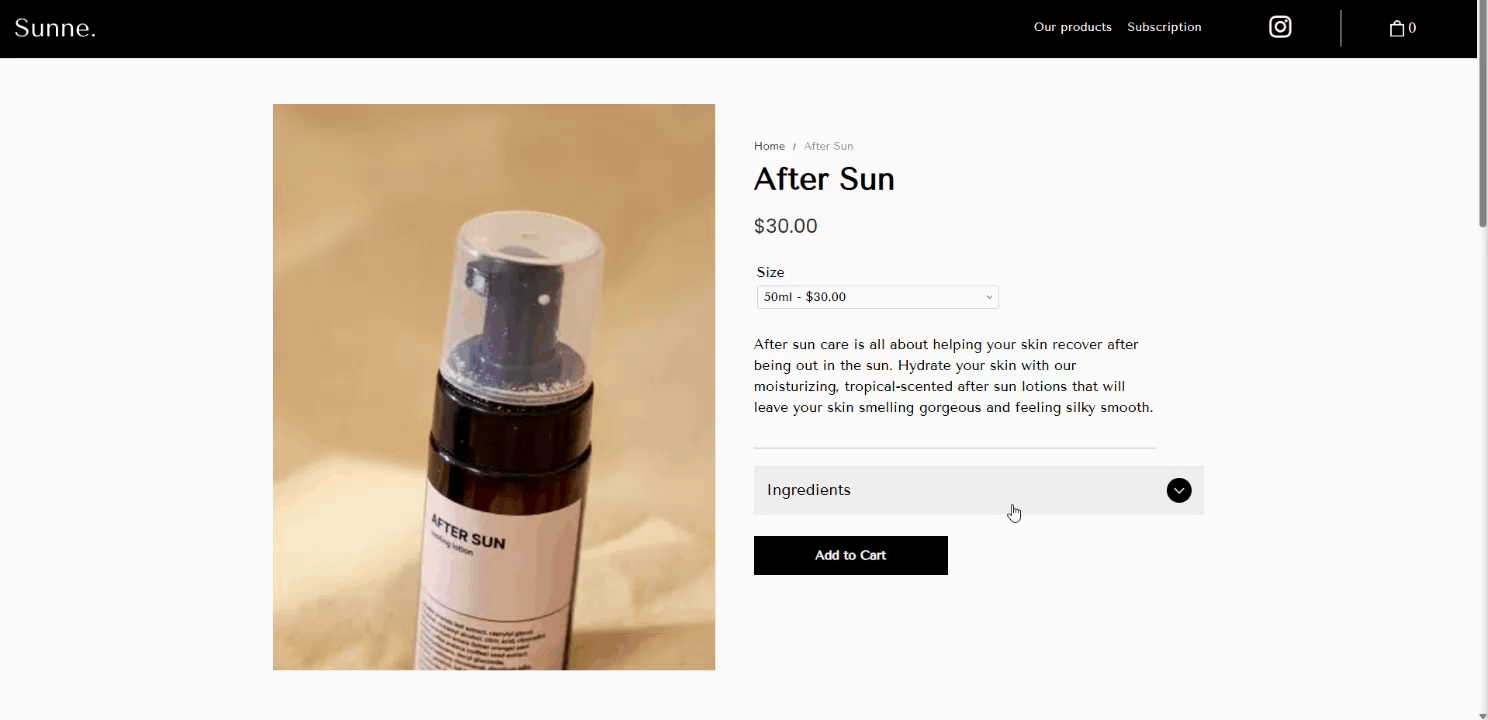
Displaying Additional Information on Product Pages #
Content Blocks, previously known as Custom Fields, allow you to display extra details about a product, such as instructions or warranty information, directly on its product page. Follow the steps below to create and connect Content Blocks to your product pages.
- Access Store Management:
- In the side panel, click Sell Online, then select Store Management.
- Manage Products:
- Click Manage Products.
- Open the product for which you want to create a Content Block.
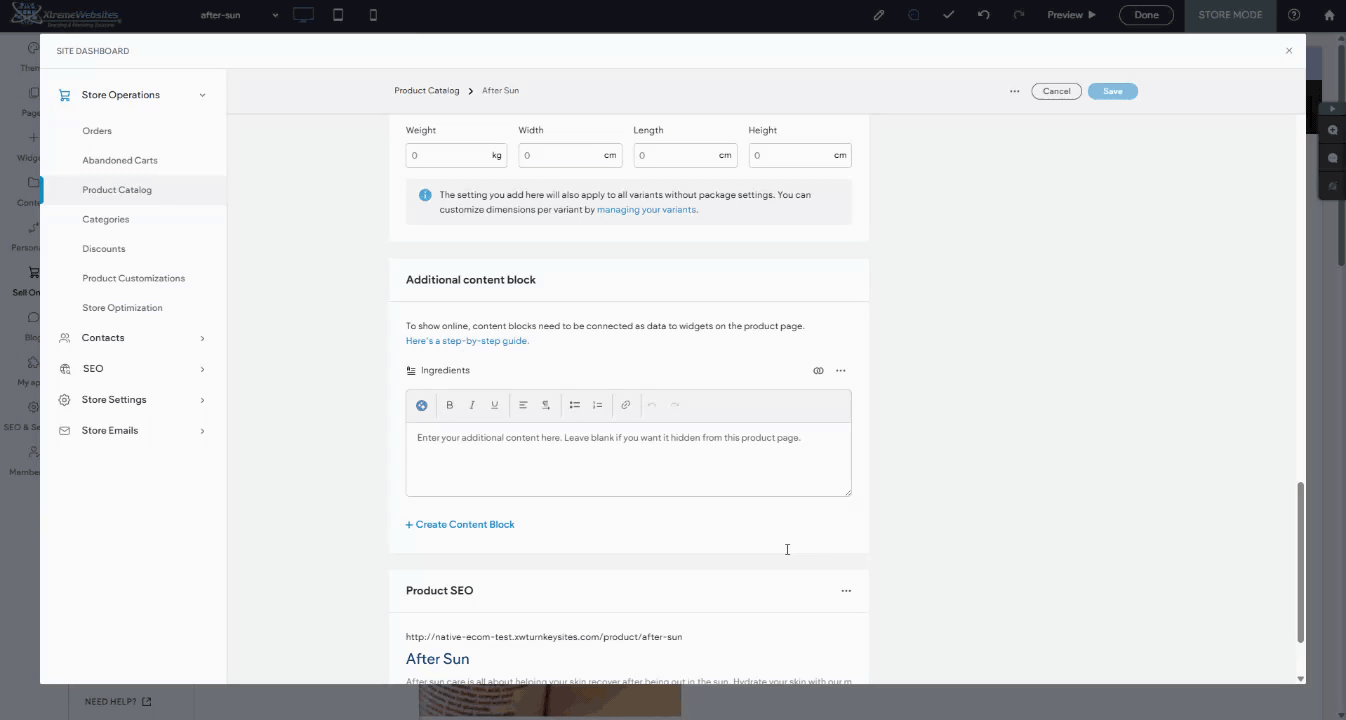
- Create a Content Block:
- In the Custom fields section, click +Create Content Block.
- Enter a title (up to 2000 characters). Ensure it is distinct from any default fields like product name or description.
- Select the field type using the What kind of content is this? dropdown. Options include HTML/rich text, plain text, video, and image. Note: Only one image per Content Block is allowed.
- Click Create and add the desired content to the custom field.
- Click Save.
Once a Content Block is created for a product, it is available for editing across all products but will only display on product pages when a value is assigned to it.
Connecting Content Blocks to Widgets #
Before displaying Content Block information, ensure a widget is added to the product page where the content will appear. To connect a Content Block to a widget on the product page:
- Access Store Pages:
- In the side panel, click Sell Online, then choose Store Pages.
- Select Product Page:
- Add a Widget:
- In the side panel, click Widgets.
- Drag and drop the desired widget onto your Product page (choose a widget type that matches the Content Block, such as text or image).
- Connect to Content Block:
- Right-click the widget and select Connect to data.
- Use the dropdown menu to select the previously created field.
- Click Done.
By utilizing Content Blocks and widgets effectively, you can enrich your product pages with additional, valuable information, enhancing the customer experience.
Update Connected Widgets on Product Page #
You have the option to modify which field from the Product Catalog is displayed within a specific widget on the product pages. For instance, you can change a Text widget that currently shows the price to instead display the product SKU.
- Access Store Pages:
- In the side panel, click Sell Online and then select Store Pages.
- Select Product Page:
- Choose the Product Page where you want to make changes.
- Choose the Widget:
- Click on the widget you wish to update.
- Connect Data Field:
- Go to the Connect tab and use the drop-down menu to select the data field you want to connect to the widget.
- Finalize Changes:
- Click Done to save your updates.
Any widget successfully connected to the data in the Product Catalog will be marked with a blue Connected Data icon.
What's your Reaction?
You have reacted on"Optimizing Product Pages"
A few seconds ago


 Subscriptions
 My Orders
 My Wishlist
 Refer & Earn💸
 My Projects
 Conversations
 Website Services
 New Website Request
 Website Addons
 Graphic Design
 Video Production
 Marketing Services
 Get a Marketing Plan
 Local SEO Audit

 Latest Updates
 Consultation Calls
 Tools & Extensions


