Posting to YouTube frequently and consistently is the most important thing when trying to grow and maintain an audience. The algorithm benefits channels that keep an active presence and thanks to the help of your Social Planner you can organize your content and boost your brand’s presence.
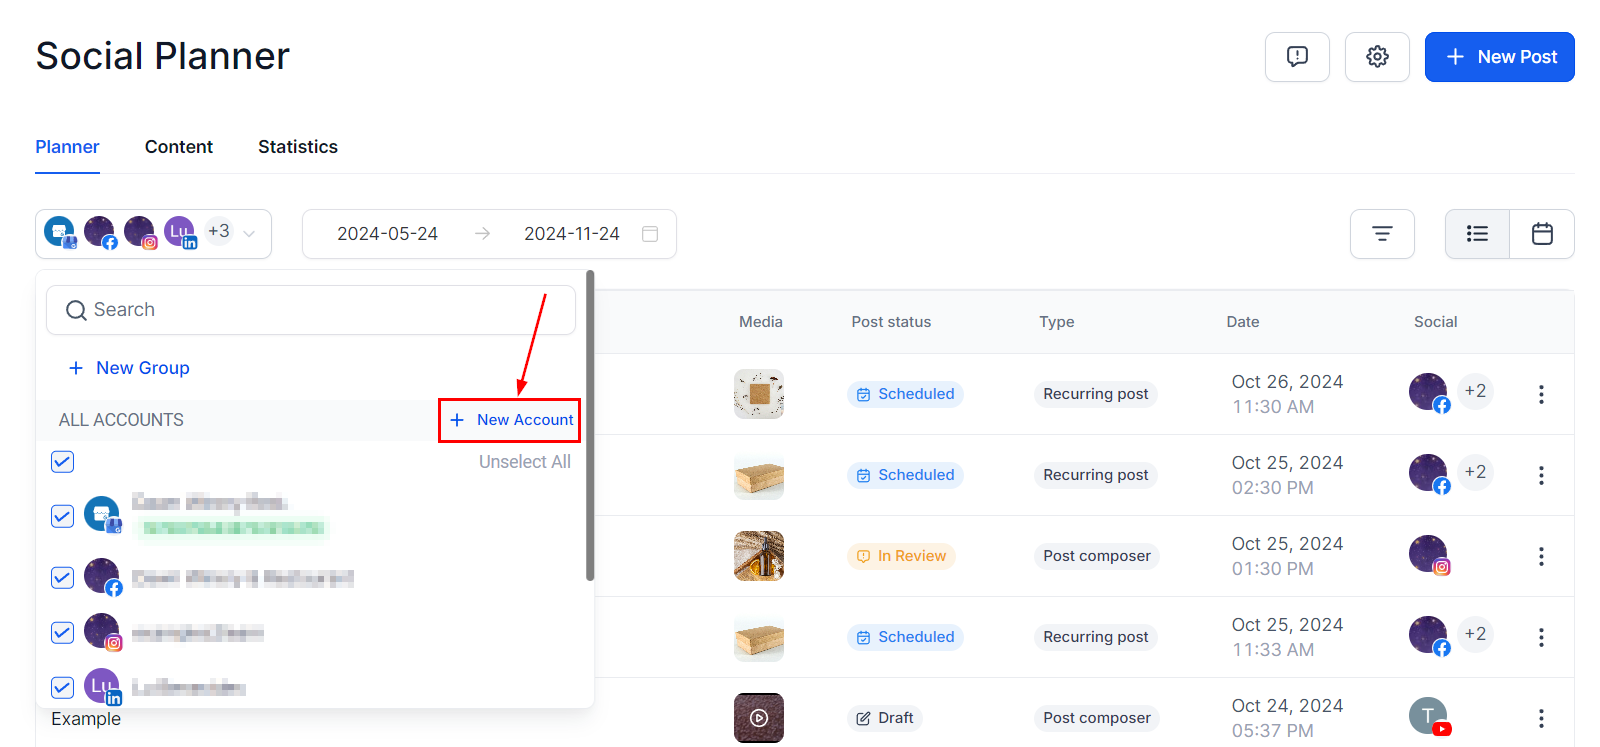
Make sure you have connected your YouTube channel before proceeding, if you haven’t you can do so by clicking on the downward pointing triangle and then clicking Add Account.
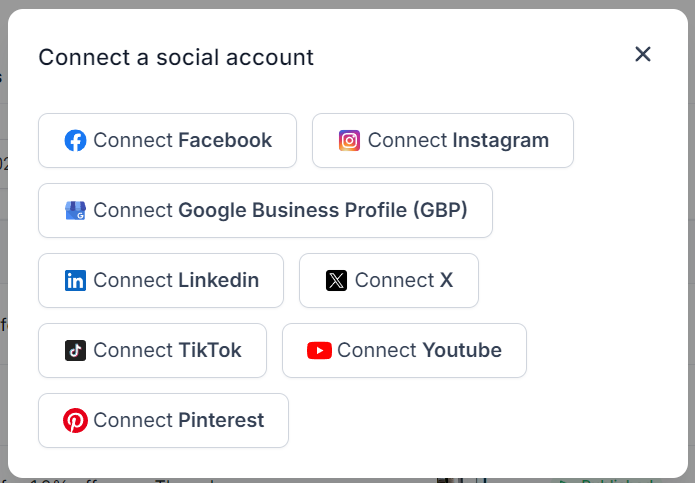
Select the YouTube icon, this will take you to another window to log in to your account and connect your channel.
For New Posts #
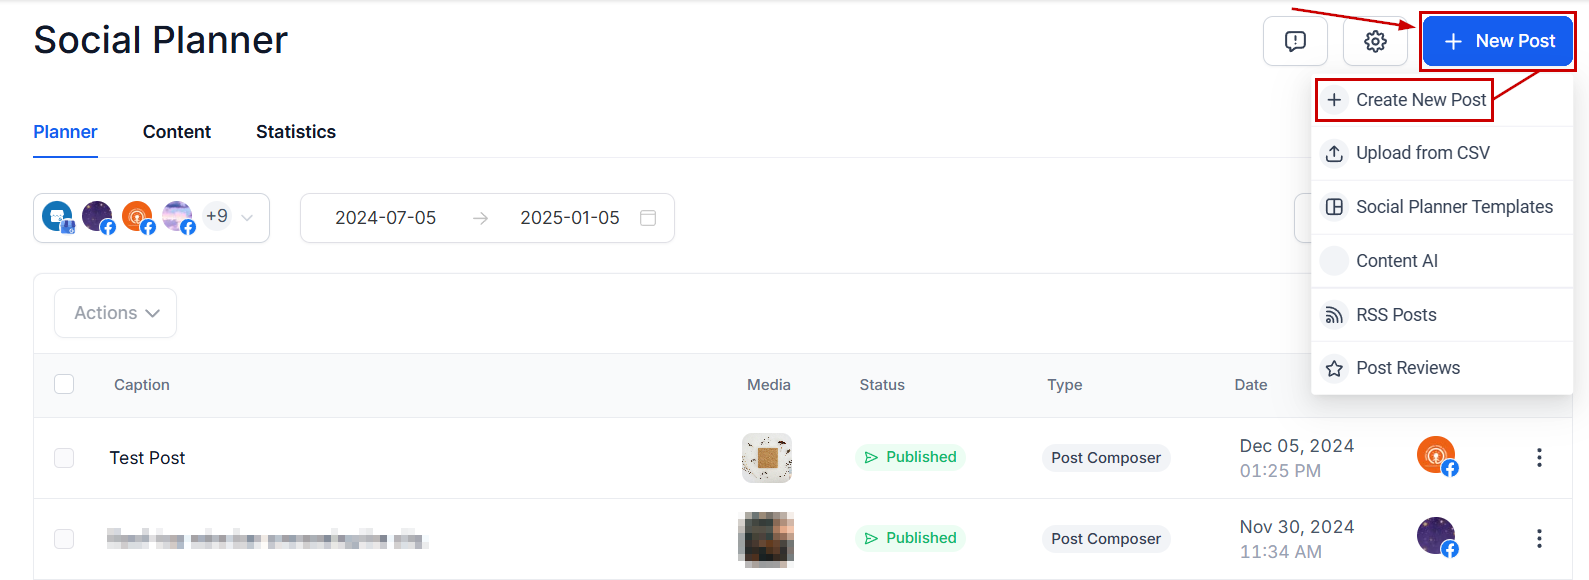
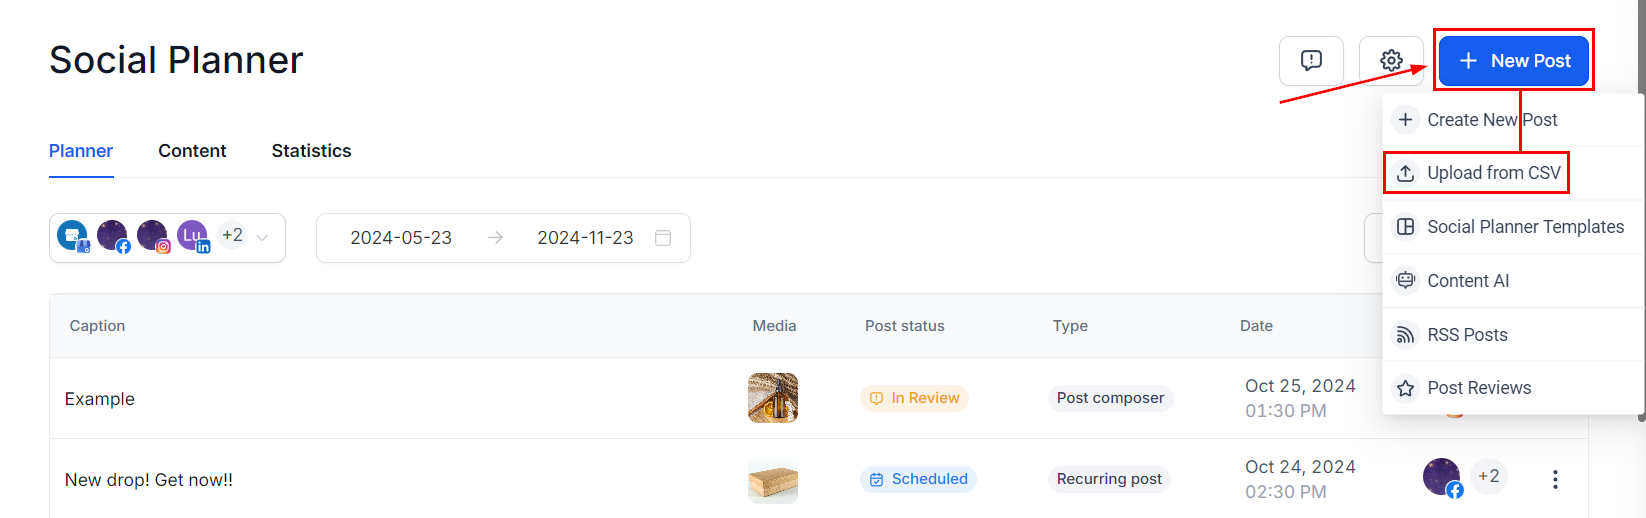
To create a post from scratch, start by clicking “New Post” in the top right corner. Select “Create New Post.” Alternatively, there’s also a “Create New Post” link at the bottom of your posts list.
Select YouTube as the social media platform on which you want to post.

Type in your caption and hashtags, or click the robot icon to use the AI tool to aid you in the content creation. Get creative with adding formatting elements like bolded and italicized text.

To upload your video click on the camera icon, this will take you to your media library where you can select from already uploaded or upload a new video from your files.

The Follow-up comment lets you post an automated message after posting.

Scroll down to YouTube options, and open the drop-down menu to set the details.
- Add your video Title for the video to be posted.
- Select the Post Type, please remember that Shorts can’t last longer than 60 seconds.
- The Privacy Level, selecting Public makes it available to all, Private keeps the video only for people who get access granted by you, or Unlisted to make it unavailable

You can preview all your content here before you post it.

Once you are happy with your post click on the Post button, it will give you the options for the next step with the post. These will be:

After selecting the next step you’re done! Your video is ready to go.
For CSV File Posts #
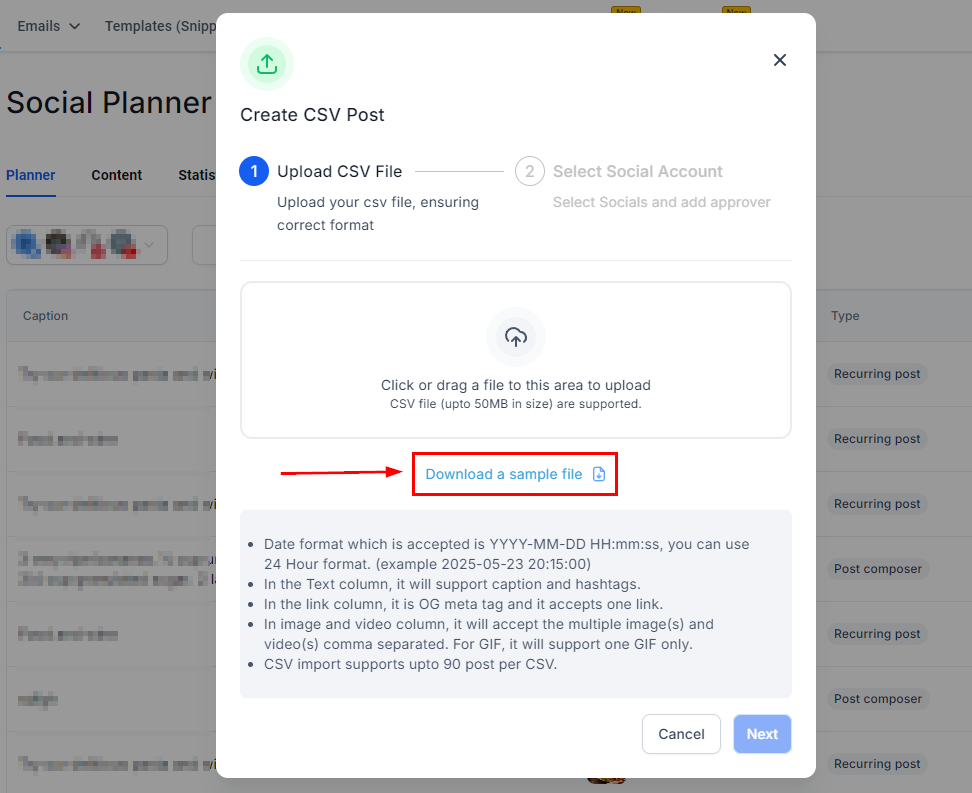
If you have several posts planned ahead of time you can create them as a CSV file and upload them at once. By uploading your posts this way you can schedule up to 90 posts per CSV. To start click on the “New Post” button and select the “Upload from CSV” option to direct you to the upload page.
Please keep in mind that your CSV should be properly formatted, you can click “Download a sample file” to get a template of how to format your file.
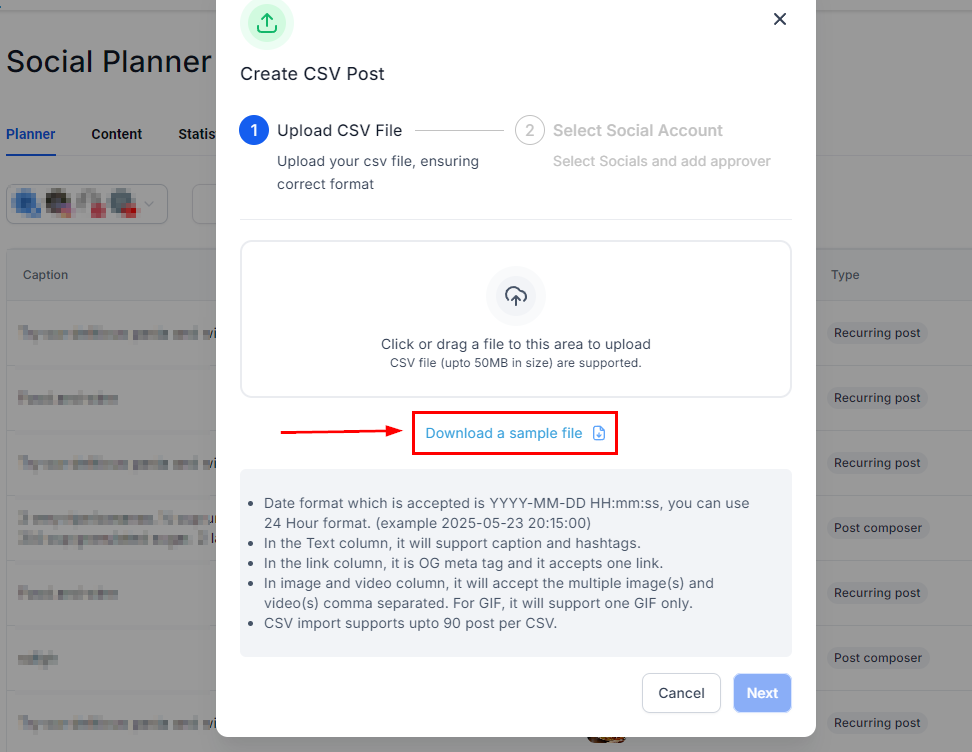
The file needs to:
- The date format accepted is YYYY-MM-DD HH:mm: ss; You can use the 24-hour format. (example 2025/05/23 20:15)
- The Text column will support captions and hashtags.
- In the link column, it is an OG meta tag, and it accepts one link.
- The image and video column will accept multiple image(s) and video(s) comma-separated. For GIF, it will support one GIF only.
Then click Next to select the socials to select the channels you want to post to. As well as selecting the Approver if needed.

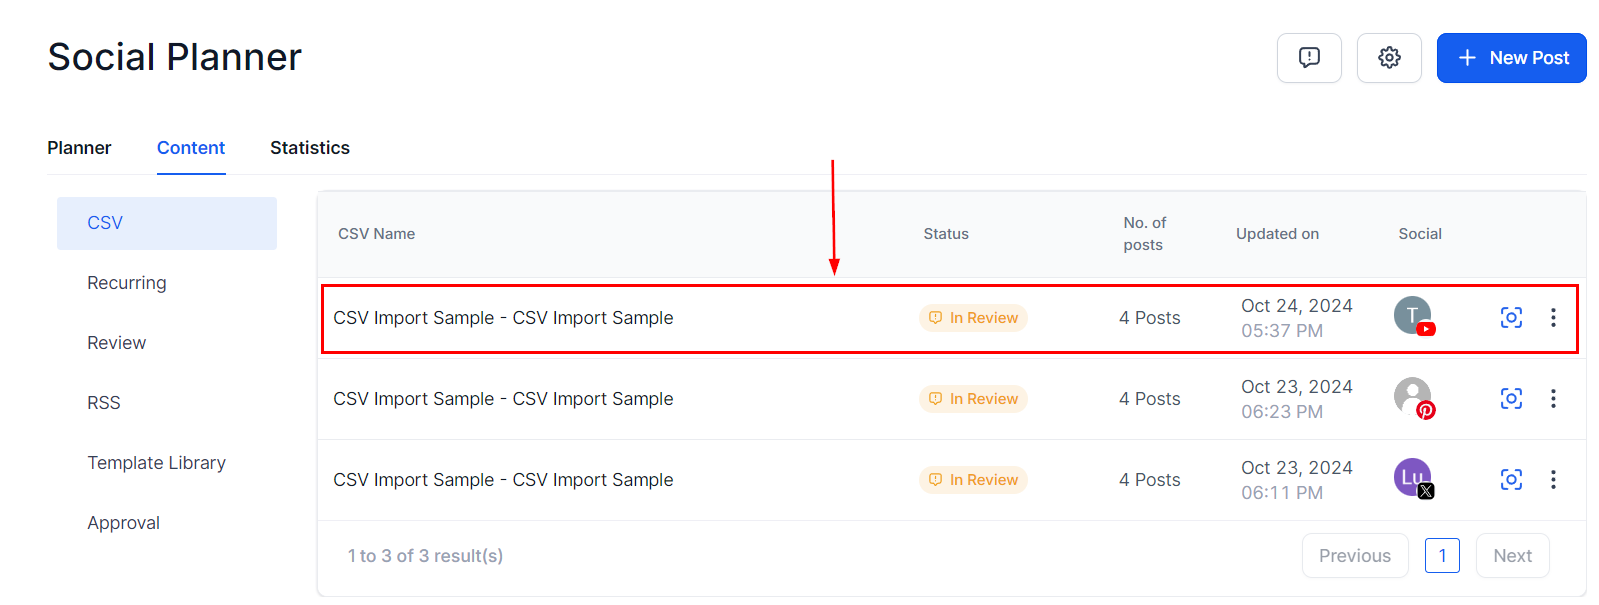
After the posts are imported by clicking on Process CSV, they need to be reviewed by the chosen approver. Once approved, they are scheduled on the social calendar. If no approver is selected they will be scheduled directly.
That’s all there is to it. Now you can get your posting schedule organized and consistent helping you to grow your audience and reach new heights.
Important Notes:
- Users can add videos and shorts of up to 1GB.
- Thumbnails can be PNG or JPEG and up to 2MB for a verified user.
- Shorts should have a vertical aspect ratio (recommended 9:16).
What's your Reaction?
You have reacted on"Posting to Youtube"
A few seconds ago


 Subscriptions
 My Orders
 My Wishlist
 Refer & Earn💸
 My Projects
 Conversations
 Website Services
 New Website Request
 Website Addons
 Graphic Design
 Video Production
 Marketing Services
 Get a Marketing Plan
 Local SEO Audit

 Latest Updates
 Consultation Calls
 Tools & Extensions