An order bump is a limited-time, exclusive offer presented to customers immediately after they make a purchase or express interest in a product. Available only following a specific purchase, the order bump aims to encourage customers to make an additional purchase while they are already engaged in the buying process. Therefore, this technique can significantly boost the average order value without the need for extra marketing efforts to attract new customers. Read on to learn how to add an order bump to your funnel.
Best Practices for Order Bumps #
- Relevance: Ensure the order bump is closely related to the main product to increase the likelihood of purchase.
- Value Proposition: Clearly articulate the benefits of the order bump to encourage customers to take advantage of the offer.
- Pricing Strategy: Price the order bump attractively to make it a no-brainer for customers.
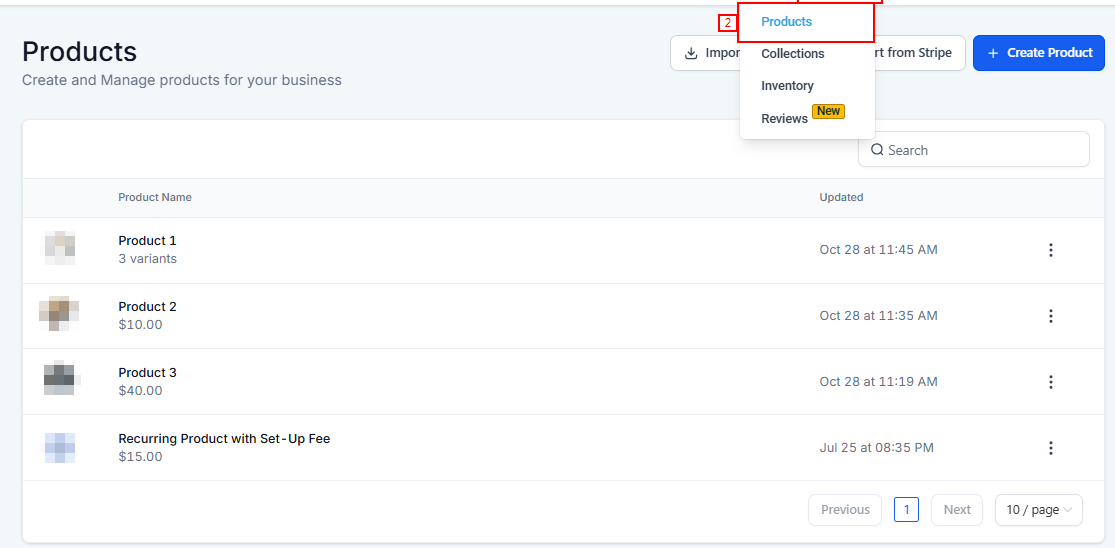
Setting Up Products #
To get started, navigate to the Payment section of your account, hover on the Products dropdown, and click on Products.
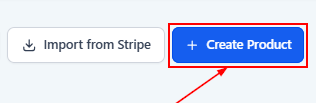
Creating a New Product #
Click on Create Product. Enter the product name, description, and pricing details. Remember, all information entered here is client-facing, so ensure it’s clear and accurate.
Product Options #
On the product creation page, scroll down to Pricing and choose whether the product is a one-time purchase or a recurring subscription.

If it’s recurring, specify the frequency (e.g., daily, weekly, monthly, yearly, etc).

Additional Options #
Here, you can set a trial period, the number of payments, and if applicable, a setup fee. For membership offers, ensure the product is linked to the correct offer in your membership area.

After creating your main product, you can add another product that will serve as your order bump, following the same steps as above.
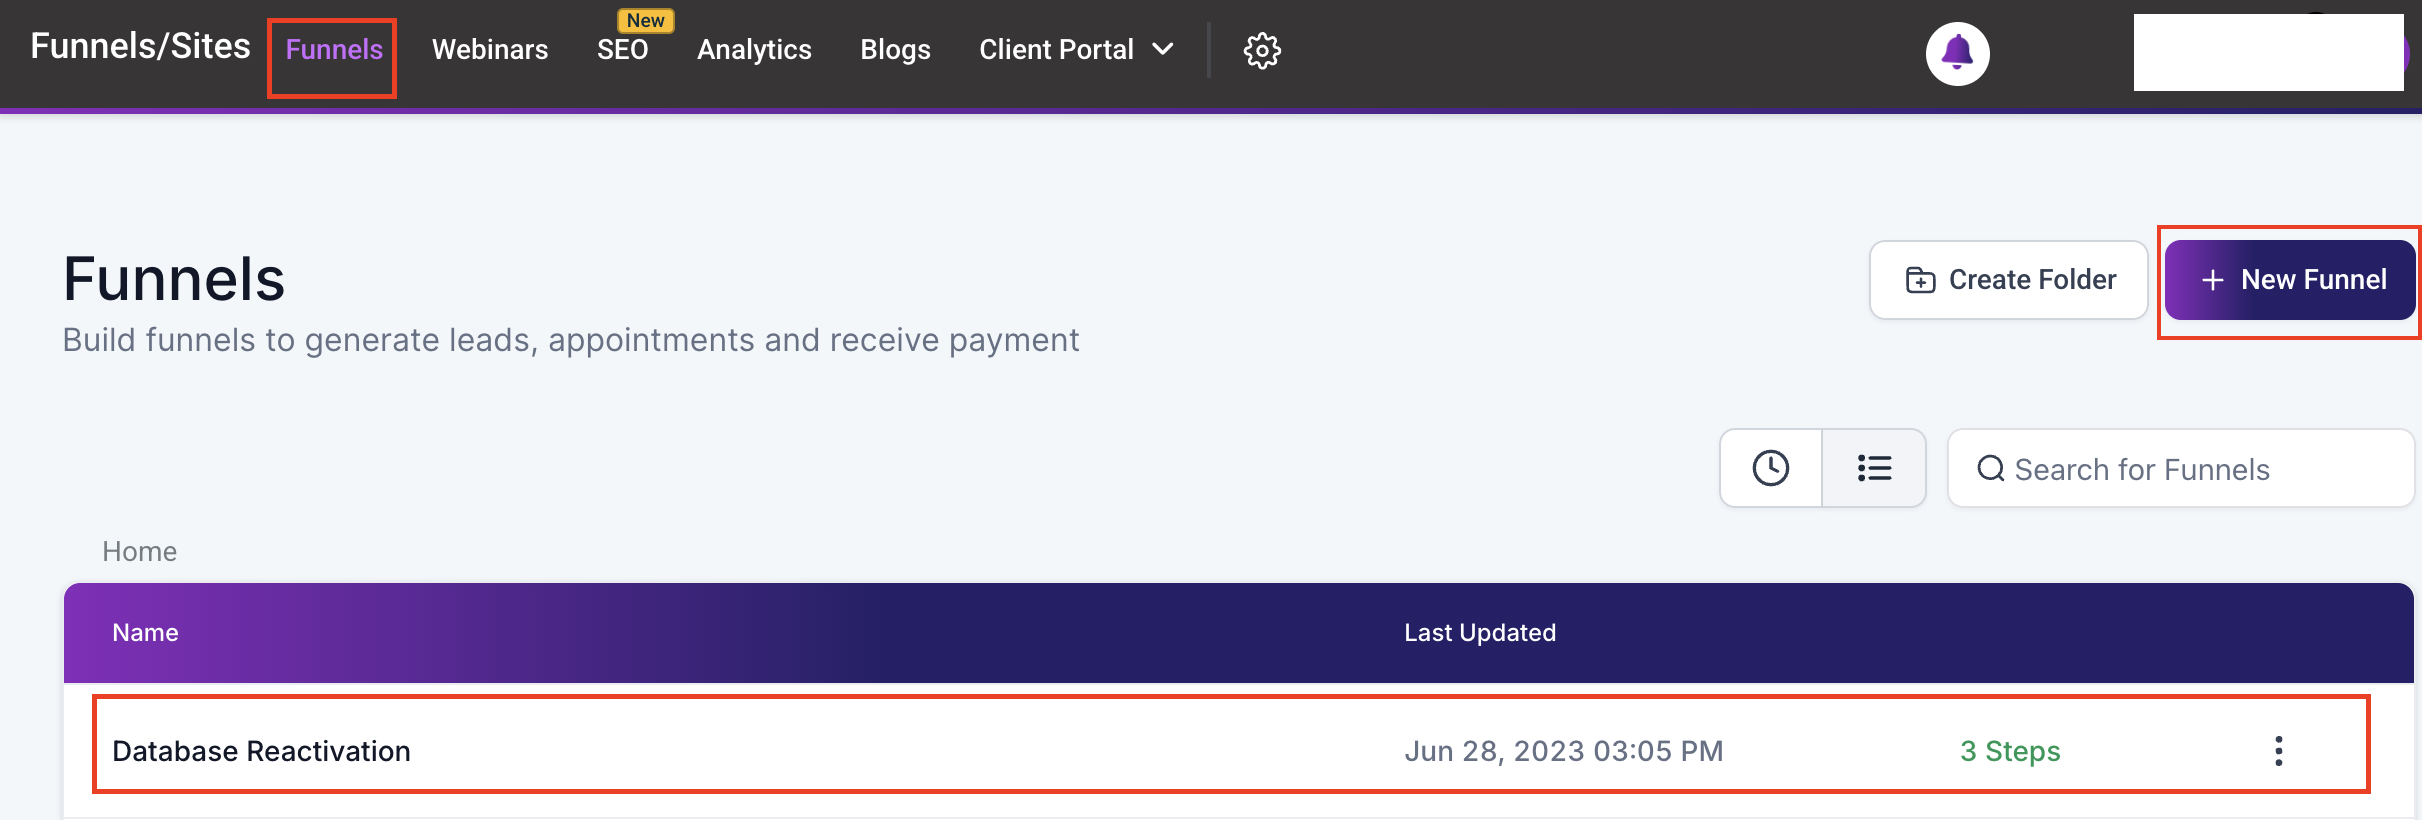
Linking Products to Your Funnel #
Navigate to the Sites section, and access the Funnel tab. Once there, pick the funnel where you want to add the Order bump or create a New funnel by clicking the +New Funnel button.
Once you have found the funnel you want to use, proceed to edit the funnel step. On the right-hand panel, navigate to products and click on the +Add Product button.

Add the product of your choice and fill out the necessary details like name and pricing.

Click on the Additional Options dropdown to access the Bump product option, once you turn on Bump products, click on Save to activate the option.

If you have not already added a main product, please ensure that it is added before proceeding.
This is how the order bump will appear in your funnel step.

Adding the Order Bump To The 2-Step Order Form #
Now proceed to edit the Funnel. Once inside, add an order form to the page. Access its settings and click on Advanced, then scroll down to toggle on the Order Bump option. Add the necessary details and click on Update.
Note: You can toggle on Enable by default to allow the Order bump option to be selected by default when the customer is on the checkout page.

Preview The Order Form #
On the order form preview, ensure to fill out the info on the ‘Where Should We Ship it” page before you can access the main checkout page. Make sure the order form includes your main product and order bump, with clear descriptions and pricing.

Remember to test your funnel thoroughly to ensure a smooth process for your customers. With these strategies in place, you’re well on your way to maximizing your funnel’s potential.
By following the steps outlined in this guide, you should now be equipped to add order bumps to your funnel effectively. This feature is a powerful tool to increase sales and enhance the customer experience.
Troubleshooting Tips #
- Testing Your Funnel: Before going live, switch your funnel to test mode and run through the purchase process using test credit card details to ensure everything works as expected.
- Order Bump Not Displaying: Ensure the product is correctly marked as a ‘Bump Product’ and that the order bump feature is activated in the funnel settings.
- Incorrect Pricing or Description: Double-check the product details in the ‘Payments’ section and ensure they are accurately reflected in the funnel.
Frequently Asked Questions #
Q: How do I know if my order bump is working?
- Test the purchase process in test mode. The order bump should appear as an optional add-on in your order form.
Q: Do order bumps work for digital products?
- Absolutely! Order bumps can be highly effective for both physical and digital products. The key is ensuring the bump offers additional value related to the primary product.
What's your Reaction?
You have reacted on"How to Add an Order Bump to a Funnel"
A few seconds ago


 Subscriptions
 My Orders
 My Wishlist
 Refer & Earn💸
 My Projects
 Conversations
 Website Services
 New Website Request
 Website Addons
 Graphic Design
 Video Production
 Marketing Services
 Get a Marketing Plan
 Local SEO Audit

 Latest Updates
 Consultation Calls
 Tools & Extensions


