Managing your funnel settings is essential for optimizing the performance and functionality of your funnels. In this guide, you’ll learn how to configure critical aspects of your funnel, including domain setup, tracking codes, payment modes, and more. Understanding these settings will help you effectively manage and customize your funnels to meet your business needs.
From the Funnels/Sites section in your account, select the desired Funnel, then navigate to the Settings tab.
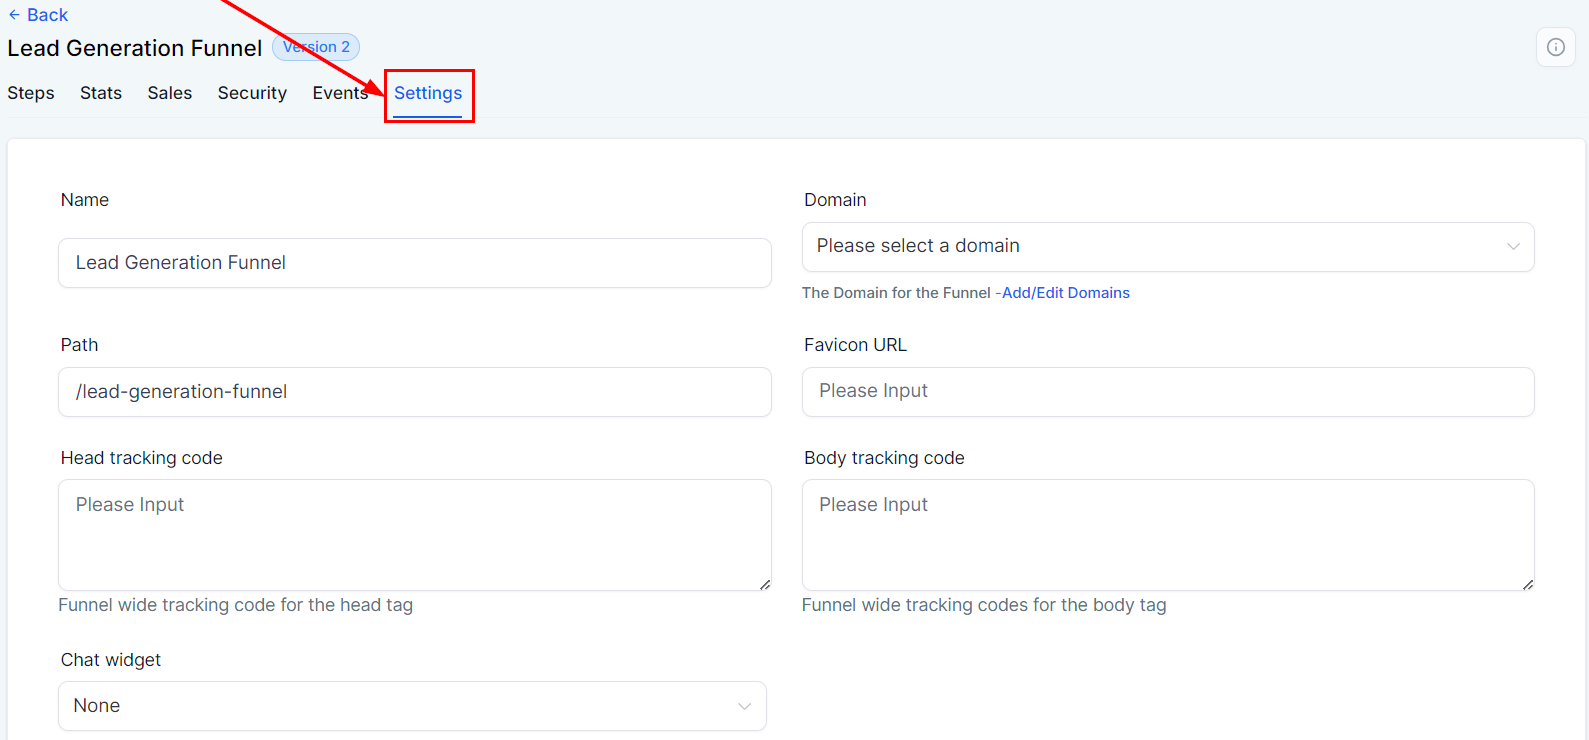
More Information #
Clicking the More Information icon provides additional details about the funnel’s URL.

Funnel Name #
You can name or rename your funnel by entering your preferred name in the designated field.

Domain #
In the “Domain” field, select the domain you wish to associate with this funnel. This is essential, as the funnel cannot be live without an assigned domain.

If you don’t have a domain in your system yet, navigate to Settings -> Domain to create one, or contact your administrator for access.
Path #
Set a default path for your funnel by entering a path description in the provided field. You can also modify the path for each funnel step under the “Step” tab.

Favicon URL #
The favicon is the small icon or logo, typically representing your business, displayed in the browser tab. To add a favicon to your funnel, paste the favicon URL (.png or .ico) in the designated field. This will apply the favicon to all pages within the funnel.

Head Tracking Code #
Enter your Head tracking code here for the head tag.

Body Tracking Code #
Enter your Body tracking code here for additional tracking options.

Chat Widget #
To enable the chat widget for this funnel, select the desired widget from the dropdown menu. The chat widget is particularly useful for lead generation funnels, as it consolidates conversations with leads into a single channel.

Payment Mode #
The payment status of the funnel is determined by the payment mode. If you’re testing payments, toggle “Payment Mode” Off, so that transactions will be for test purposes and won’t process any real payments. Once you toggle it “On,” the funnel will go live, and all payments will be processed as real transactions.

Require Credit Card #
Enable this option to require leads to add a credit card for purchases of $0.

Image Optimization #
Enable this option to optimize all images added to the funnel for performance. These images will be delivered through a CDN with caching enabled, ensuring faster load times.

Optimize Javascript #
When enabled, custom JavaScript and HTML code added to the funnel will be lazy-loaded to enhance page speed and overall performance.

GDPR Compliant Fonts #
If this option is enabled, the fonts used in the funnel will be GDPR Compliant fonts instead of Google Fonts.

Lastly, you can delete the entire funnel, or save the changes you made to the funnel settings by clicking the respective option.

By managing your funnel settings effectively, you ensure that every aspect of your funnel is optimized for your business needs. Take control of these settings to ensure your funnel operates smoothly and efficiently for both you and your customers.
What's your Reaction?
You have reacted on"Settings Tab – Funnels"
A few seconds ago


 Subscriptions
 My Orders
 My Wishlist
 Refer & Earn💸
 My Projects
 Conversations
 Website Services
 New Website Request
 Website Addons
 Graphic Design
 Video Production
 Marketing Services
 Get a Marketing Plan
 Local SEO Audit

 Latest Updates
 Consultation Calls
 Tools & Extensions


