The first step in generating documents and contracts is to create a template within the CRM. This section will guide you through the process of setting up a template that can be customized and reused for various clients and projects.
Accessing the Template Section #
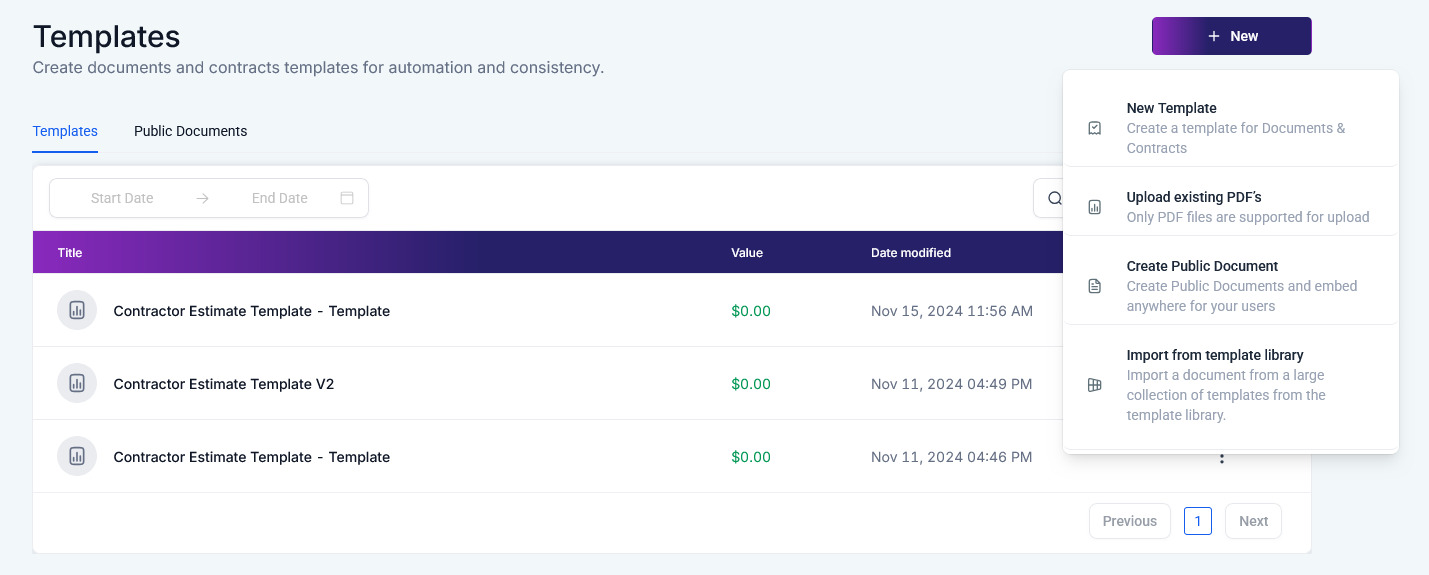
To start head to “Data Collect” > “Proposals & Docs” > “Templates” to manage your document and contract templates. Once in the Templates section, hit the + New button to create a fresh template.
Give it a name that helps you identify it later, like “Master Template.”

Customizing Your Template #
Start by inserting your logo or an icon at the top of the document. Adjust its size and background color to match your branding.
Click on the “+ button” on the top left side of your screen and drag and drop the image element onto the page.

Once you’ve got your contract ready in a document, simply copy and paste it into your template. But before moving forward, it’s always smart to ensure it’s been thoroughly reviewed by a legal expert. This step guarantees your document covers all legal bases and avoids future issues.

Adding Signatures to Your Template #
If your document needs signatures, you’ll need to set those up as placeholders. Let’s break down how to add single or multiple signatures.
In the template, you’ll find a section to drag and drop signature blocks. Add one for your client and another for your company. Label them as Client Signature and Company Signature.

For the company signature, you have the option to assign it to the “Sender” instead of a specific individual. Select the signature field you want to assign to the sender. Under Properties, choose Sender as the signer. For the client’s signature, leave it blank for now; that gets filled in when the template is used.

NOTE: In Workflows, even if you assign a field to “Sender,” it will be tied to the business user who last edited the document. This happens because workflows are usually triggered by contacts and may not map to a specific sender.
Add as many signatures as you need and label them clearly. The person’s name will appear above the signature field if you’ve selected the auto-fill checkbox.

Inserting the Date Element allows you to have things like the beginning day of the project or the day the client signed the contract as part of the document.
If you need the date on which things were signed, you can make it limited to today’s date only, you can also limit the dates to only past or future dates as well.

Using Your Template for a Specific Client #
Once your template is set up, the next step is customizing it for a specific client. Click Use Template in the upper right corner to generate a fresh document for your client. This duplicates your template, keeping the original intact.

Click on the signature block (like “Client’s Signature”). In the Properties panel on the right, under “To be signed by,” select the contact (client) from the dropdown.
Assign the appropriate contact to each signature field, such as the client for “Client’s Signature” and your company for “Company’s Signature.”

Before sending it off, update any client-specific details, like products, charges, or extra terms that apply just to them.

Troubleshooting and FAQs #
Q: What if I need to add more than two client signatures?
- A: You can add additional signature blocks by clicking on ‘Add more recipient’ and labeling each block with the respective client’s name or role.
Q: How do I ensure my template is legally binding?
- A: Ensure your contract text is reviewed by a legal professional and include an electronic signature acknowledgment section in your template.
Q: What happens if I assign a field to “Sender” in a workflow?
- A: In workflows, even if you assign a field to “Sender,” it will be tied to the business user who last edited the document. This is because workflows are usually triggered by contacts and may not map to a specific sender.
What's your Reaction?
You have reacted on"How To Add Signatures To Documents and Contracts"
A few seconds ago


 Subscriptions
 My Orders
 My Wishlist
 Refer & Earn💸
 My Projects
 Conversations
 Website Services
 New Website Request
 Website Addons
 Graphic Design
 Video Production
 Marketing Services
 Get a Marketing Plan
 Local SEO Audit

 Latest Updates
 Consultation Calls
 Tools & Extensions


