

 Subscriptions
 My Orders
 My Wishlist
 Refer & Earn💸
 My Projects
 Conversations
 Website Services
 New Website Request
 Website Addons
 Graphic Design
 Video Production
 Marketing Services
 Get a Marketing Plan
 Local SEO Audit

 Latest Updates
 Consultation Calls
 Tools & Extensions
10
Jun
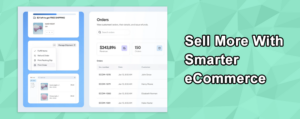
Smarter eCommerce Product Management at Scale📦
Manage Turnkey eCommerce™products at scale with less friction, more features and more speed.
June 10, 2026
June 10, 2026
June 10, 2026
June 3, 2026
May 26, 2026
May 20, 2026
In the Ad Manager, you can create campaigns designed to drive lead generation by encouraging users to complete your Facebook forms, seamlessly integrating the data within the platform. Additionally, you can boost website traffic and motivate leads to take meaningful actions on your page. This guide offers an overview of the Ad Manager section, helping you optimize your campaign management and maximize the platform’s capabilities for effective advertising.
To get started with the Ad Manager, navigate to the Marketing section in your account.

After successfully connecting your Facebook account, you can access the list of pages by clicking on the pages dropdown menu. From there, select each page you want to manage within the Ad Manager by choosing the desired options from the dropdown list.

View data from a selected date range by filtering using the date picker.

Add and manage the Facebook pages, conversion pixels, or Facebook audiences for your ad campaigns

Initiate the creation of a new campaign by selecting this button.

In this section, you can view the tabulated details of all your campaigns. Additionally, you can filter campaigns by status by selecting options such as Published, Drafts, Failed, In Review, or Paused.

To quickly locate your campaign, enter the first few characters of its name in the search bar.

By clicking the refresh button, you can ensure that you are viewing the most current information regarding your campaigns, including metrics and statuses.

This tab displays the names of your campaigns, serving as a key identifier.

This tab indicates the specific Facebook page associated with each campaign. It allows users to manage and link their campaigns to the appropriate social media presence, ensuring consistency in branding and messaging.

This tab provides information about the media assets associated with each campaign, such as images, videos, or ad creatives. Users can review which media are being used and assess their effectiveness in engaging the target audience.

This tab indicates the primary goal of each campaign- lead generation, or website traffic.

This tab displays the current status of each campaign, such as Published, Paused, or Failed. Monitoring the status helps users quickly identify which campaigns are performing and which may need attention.

This tab shows the date and time when the campaign was last updated. This information is useful for tracking changes.

This tab shows the spending limit allocated for each campaign. Understanding the budget is essential for managing overall advertising costs and ensuring effective resource allocation.

To modify campaign settings, select the Edit option from the actions dropdown. To pause an active campaign, simply choose the pause option. If you wish to duplicate the campaign, click “Clone”, which will create a replica of the campaign at the top of the list, with the campaign name suffixed by “(clone)”. Click the delete option to permanently remove the campaign from your account.

Now that you know about each component in the Ad Manager, explore the other articles in this section to learn how to create an Ad Manager campaign and much more!