

 Subscriptions
 My Orders
 My Wishlist
 Refer & Earn💸
 My Projects
 Conversations
 Website Services
 New Website Request
 Website Addons
 Graphic Design
 Video Production
 Marketing Services
 Get a Marketing Plan
 Local SEO Audit

 Latest Updates
 Consultation Calls
 Tools & Extensions
10
Jun
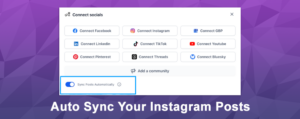
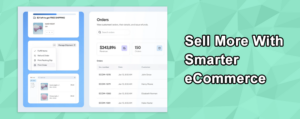
Smarter eCommerce Product Management at Scale📦
Manage Turnkey eCommerce™products at scale with less friction, more features and more speed.
June 10, 2026
June 10, 2026
June 10, 2026
June 3, 2026
May 26, 2026

May 20, 2026
Effectively managing audiences in Ad Manager is crucial for optimizing advertising strategies and ensuring precise targeting. This guide will provide detailed instructions on how to locate and manage your custom and lookalike audiences. It covers essential tasks such as creating new audiences, editing existing ones, and deleting audiences when necessary. By following this guide, you can ensure that your audience management aligns with your campaign objectives.
To access your list of audiences, navigate to Ad Manager Settings by clicking the settings icon on the Ad Manager homepage.

Within the settings, you’ll find four tabs: Integrations, Pages, Conversions, Audiences, and Subscription. Each tab serves a specific purpose, but this guide focuses on the Audiences tab. Once you click the Audiences tab, you can view all audiences, including those created within Ad Manager and those imported from connected Meta accounts.

Note: The Integrations tab is excluded in the Default Ad Manager, as it doesn’t require an ad account connection. Instead, a child Business Manager is created for ad publishing with a saved payment method.
You can create new audiences in two ways:
Both custom and lookalike audiences can be created directly within the campaign creation flow. For detailed steps, refer to the other articles in this section.
Click Create New Audience under the Audiences tab. Choose between a Lookalike Audience or a Custom Audience, then follow the respective creation process to add the new audience to your list.

Use the Search for Audience box to locate a specific audience by name.

Filter the list by selecting All, Custom, or Lookalike audiences to refine your view.

Click this button to import additional audiences from the connected Ad account, ensuring that your Ad Manager reflects all relevant audiences.

In this column, you can view the title given to your audience for easy identification.

Here, you can see whether the audience is a Custom or Lookalike audience.

Under Audience Status, you may see:

In this column, you can see the date and time the corresponding audience was created.

View the date and time the audience was last modified to track recent changes or updates.

Click the ellipsis icon next to an audience to access its actions menu. You will be presented with options to edit, view, or delete the audience permanently.

Whether you’re creating, editing, or deleting audiences, these tools offer flexibility and control over your campaigns. By following this guide, you can effectively manage your audience lists to support your marketing objectives.
Q: Is there a limit to the number of audiences I can create?
Q: How often can I update audience criteria?
Q: What happens if I delete an audience?
Q: Can I use multiple audiences in a single campaign?