

 Subscriptions
 My Orders
 My Wishlist
 Refer & Earn💸
 My Projects
 Conversations
 Website Services
 New Website Request
 Website Addons
 Graphic Design
 Video Production
 Marketing Services
 Get a Marketing Plan
 Local SEO Audit

 Latest Updates
 Consultation Calls
 Tools & Extensions
10
Jun
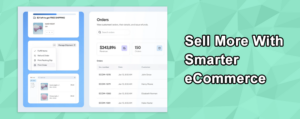
Smarter eCommerce Product Management at Scale📦
Manage Turnkey eCommerce™products at scale with less friction, more features and more speed.
June 10, 2026
June 10, 2026
June 10, 2026
June 3, 2026
May 26, 2026
May 20, 2026
A Custom Audience is a targeting feature that enables you to reach a specific group of individuals who have previously interacted with your business. This audience can include people who have visited your website, engaged with your Facebook or Instagram page, or interacted with your lead forms and other ad content. By using Custom Audiences, you can re-engage these users with tailored ad campaigns, enhancing the relevance and effectiveness of your advertising efforts. In this article, we will dive into creating Custom Audiences and utilizing them during the campaign creation process in Ad Manager.
To get started, go to the Ad Manager section within Marketing and click on the Settings option.

Next, navigate to the Audiences tab and click the “+ Create New Audience” button.

From the available options, select Custom Audience to proceed.

Alternatively, you can create a custom audience during the campaign creation process. In the Budget and Audience step, navigate to the Retargeting tab within the Audience Controls section. From there, click the dropdown menu under “Create new” or select “Retargeting Audience,” where “Create a Custom Audience” will be the first option.

Creating a Custom Audience involves two main steps:
Clicking Create a Custom Audience opens a modal dialog to choose a source for the custom audience. Options include: Website, Facebook Page, Lead Form, and Customer List.

Next, you will configure the specifics of the custom audience based on the chosen source.
![]()

Configure the remaining fields according to your preferences to tailor the Custom Audience to your specific targeting needs.
Note: You can add up to four additional clauses similar to the ones described. These clauses can be included or excluded by using the Include more people and Exclude people options, respectively.
By selecting Facebook Page as the custom audience source in the initial dialog, you can create an audience of individuals who follow or have interacted with your page. In the subsequent step, you can define the specifics of this audience.

Configure the remaining fields according to your preferences to tailor the Custom Audience to your specific targeting needs.
Note: You can add up to four additional clauses similar to the ones described. These clauses can be included or excluded by using the Include more people and Exclude people options, respectively.
By selecting Lead Form as the custom audience source in the initial dialog, you can create an audience of individuals who have opened or completed a form from one of your lead generation ads on Facebook or Instagram. Define the specifics of this audience in the next step.


Note: You can add up to four additional clauses similar to the ones described. These clauses can be included or excluded by using the Include more people and Exclude people options, respectively.
By choosing “Customer List” as the custom audience source in the initial dialog, you can create a targeted audience by uploading a list of contacts who have engaged with your business or select a preconfigured smart list, enabling more precise targeting of existing customers.

Note: If the uploaded file format does not comply with the guidelines, the upload will fail, and an error message will be displayed. Additionally, before an audience can be created, you must accept the Customer List Custom Audience Terms of Service (TOS) from Meta. A notification will appear if you have not yet accepted the terms when you click on “Create Audience.”

After selecting your method, enter an audience name and description for easy identification. Finally, click on the ‘Create Audience’ button to finalize the process.

Once you have completed all the required fields, click the “Create Audience” button to save your Custom Audience. It will be available for campaign targeting once it’s status is marked as ready.

By following these steps, you can effectively create and utilize Custom Audiences to enhance your Ad Manager campaigns.